
How to build and paint a fence

Project overview
How are fences measured?
Fence posts and panels are normally measured in feet and inches, but you might find some in meters too. For the purpose of this guide, we’ll be talking in feet and inches.
How many fence panels do I need?
To figure out how many fence panels you need, you first need to measure the exact fence line.
You then need to consider the size of panels you’ll use and the type of post. Panels are traditionally around six feet wide, so you might not need as many as you think. Post width can vary. You should have one post for one panel as well as a start post. So if you have nine panels, you’ll need 10 posts.
Measure the line your fence will follow and divide it by the width of your fence panels, this will give you the number of panels you need. If you measured the line in meters and your fence is in feet, you will need to convert the units. Google can easily do that for you.
How high can I build my fence?
Generally speaking, most councils allow you to build a fence up to two meters (6.5 feet) high. If you want to build higher, you will need planning permission so check with your local council.
When you buy a fence panel, it might be higher than two meters. But don’t worry, this is to account for the portion that you will secure in the ground.
Different types of fencing for gardens
- Closeboard fencing is made up of vertical boards that overlap and uses more timber than other styles. It’s the strongest kind of fence and provides you with complete privacy but it generally the most expensive type of fence. You can buy either individual boards (which is great if you need to make a repair) or panels that are already constructed. This is also known as feather edge fencing.
- Overlap fencing is made of slightly overlapped horizontal boards. This type of fence is good value for money but it’s not as strong as closeboard fencing.
- Palisade or a picket fencing is largely decorative and doesn’t require as much timber as other fences. It’s useful if you want to mark out a boundary without the need for extensive privacy.

There are three different types of fencing that all offer different degrees of privacy and come at a different cost.
Which fence do I own?
Sometimes property boundaries and lines can be a sore point between neighbours but any disagreements can be resolved by looking at your title deeds. You can easily get hold of a copy of from the Land Registry.
Look for a ‘T’ on the drawing that will sit somewhere along the length of the fence. Whichever side the flat head of the ‘T’ points towards is the side that is responsible for the fence. If there’s one either side of the fence (so it looks like a sideways ‘H’) then you’re jointly responsible.
The deeds will also help show you where the boundaries of your property are.
How to build a fence
Building a fence isn’t too complicated and can be completed in a day. There are a few different ways you can put up a fence. We’ll talk you through building a fence with wooden posts, building a fence with concrete posts, attaching a fence post to house wall, how to attach a trellis to fence panels and how to fix a fence post on top of a wall.
To begin with, here’s how to build a standard fence with wooden posts.
- Plot out your fence
First things first, you need to plan and mark out where your fence will be. Be sure to consult your deeds first so you’re clear where the boundaries are.
Measure the line of your fence and mark where the:
- corner posts (the point where any two panels will meet at an angle),
- first post,
- and end posts will be.
You can then mark out where each post will go. Start with the first post and measure out the width of your chosen fence panels. Make a mark where each panel ends, this is where the supporting posts will be. You might find that the final panel needs to be cut to size.
- Dig a hole
Each post needs to be set in a hole roughly 450mm deep. If the ground you’re working with is particularly soft, you’ll need to dig deeper holes and use longer posts.
If you try to do this in winter you may immediately become unstuck by hard ground so it’s best to pick a milder day.
- Position the posts
You will need to hold the post in place and upright, so either rope in an extra pair of hands or create some temporary wooden props.
You can make two props with four pieces of timber tall enough to sit approximately halfway up your post. Nail two pieces of timber (roughly 19mm x 38mm) together in an L or T shape, make sure to spike one end so you can drive it into the ground.
Insert the first post into the hole and screw the props in place. Check the post is level and vertical with a spirit level. Then repeat the process with the last post.
Run a builder’s line at the top and bottom of both posts to mark out the line of the fence. Insert the other posts loosely along the line, at intervals the same width as the fence panels.
- Cut panels to size
It’s likely that you’ll need to cut at least one fence panel to size. Fortunately, it’s quite an easy job.
Remove the framing batten from one side of the panel. This is the vertical strut that forms part of the panel structure. Move the batten into position so the panel will be the right width when sawn.
Reposition the centre batten to the centre of the new panel. Once the distance is even, nail both battens in place.
Saw the panel against the outside edge of the first batten you moved. Your panel should now be the right size.
- Insert the panels
Mark six evenly-spaced points down the outer edge of your fence frame. Drill pilot holes into these marks to help guide in the nail without splitting the wood.
Use bricks to raise the fence panel slightly off the ground. This will prevent moisture from seeping in and the fence rotting.
Check the fence panel is completely level before hammering a galvanised nail through the pilot holes from the batten to the fence post.
When securing your second panel, use a wooden prop to keep the first panel and the fence vertical.
Repeat this process until all of the panels are in place.
- Cement the posts
Each post should touch both the top and bottom builder’s lines you put up earlier. This will give you a good indication that the fence is level, but still use a spirit level to double check.
Mix fast setting concrete and fill the post hole. Follow the manufacturer’s instructions to find out how you should fill the hole. Smooth the concrete away from the post with a trowel. This will prevent water pooling at the base of the post.
- Add your fence caps
If you have fence caps, soak them in a bucket of water first before you add them to the posts. This will prevent them from splitting when you nail them on.
Use a silicone-based sealant on the bottom of the chock to prevent water seeping in and causing the fence to rot.
Nail a cap to the top of each post.
And that’s it, you’ve built your fence! Don’t forget to paint or treat the wood, see the how to paint a fence section for more.
How to install concrete fence posts
Concrete fence posts provide a solid foundation to attach your fence to. They require less effort to install than a completely wooden fence and make it easy for you to just slot the panels in. That means that if a panel breaks, you just need to pull it out of the slots and replace it.
Concrete posts are much sturdier and will better withstand the wind and rain. They should also last longer as they can’t rot however they are often more expensive.
You will also need a gravel board which sits in between the bottom of your fence and the ground. These are available in concrete or wood.
You still need to plan out where the post and line of your fence will run. Use a builder’s line and pegs to plot out where your fence and posts will go.
- Dig a hole.
The hole needs to be three times as wide as the post on all sides. The depth of the hole depends on the height of your fence.
The posts should be two feet longer than the panels so you have enough excess to secure it into the ground. So if your panels are three feet high, you will need a concrete post that’s at least five feet high.
It’s up to you how high the fence panels come up the posts. You might choose to leave a gap for decorative purposes or decide to have the panels neatly sit flush with the posts.
- Place the post
Place the post in the centre of the hole, use a spirit level to make sure it’s completely level.
Hold it in place and fill the hole with quick drying concrete. Check the manufacturer’s instructions for details on how long it takes to dry.
- Insert the gravel boards
Slot the gravel board into the concrete post. This is the same process whether you’re using wooden or concrete boards.
Dig a hole at the other side of the gravel board, this is where your second post will go.
Repeat this process until you’ve secured all the posts and gravel boards for your fence.
- Slot in the panels
Once all the concrete is completely dry, you can easily slot in the fence panels.
That’s all you need to do with concrete posts. Your fence should now be secure and easy to maintain.
How to attach a fence post to a house wall
In order to completely close off your fence, you might have to attach a wooden post to the wall. This might also be necessary if you want to hang a gate as the finishing touch to your fence. Fortunately, it’s not too complicated a job.
- Position the post
Position the post against the wall, ensuring it’s the same height as your other posts and can easily connect the panel or gate.
Make three marks down the length of the post at even distances. These pencil marks should line up with the centre of the brick and not the mortar.
- Drill through the holes
Use a 25 mm drill bit to drill through the three pencil marks to about 10 mm. This will help the bolts sit flush.
Once you’ve created the countersunk holes, use a 10 mm auger drill to drill straight through the posts in the same marks.
- Reposition the post
Put the post back into position and check it’s straight with a spirit level – you might need a little bit of help holding it straight.
Drill straight through into the brisk. Use a 17 mm socket set to screw the wall bolts in nice and tight.
You can now slot the fence panel in or hang the gate.
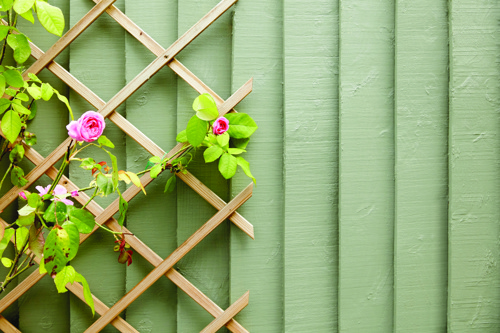
How to attach trellis to a fence panel
There are a couple of different ways you can attach a trellis to a fence panel. You can add it onto the face of the panel so plants can climb up and wind around it. Or, you can attach a decorative panel to the top of your fence.
If you want to place decorative trellis panels to the top of your fence, it’s an easy job. You will need two U brackets, some screws and a drill. Remember though – your fence must be shorter than two meters otherwise you may have to seek planning permission.
Your fence should have a gap at the top between the two posts where the trellis will sit. Simply attach a U bracket to each post, positioning it roughly halfway between the top of the post and the top of the fence panel. Use 35 mm screws to fix the brackets in place.
Then you just need to slot the trellis in place, and screw through the brackets and trellis with another 35 mm screw.
If you want to attach a trellis to the face of the panel, you need to leave a one inch gap between the trellis and the fence. Many plant trellis already come with a gap included so you simply need to screw it onto the fence panel.
If your trellis doesn’t have enough room between it and the fence panel, you can create your own gap. Line the trellis against the fence panel and make a mark at top, bottom and middle of the trellis. This will be where you will position the battens. An offcut of wood is fine, but the battens need to be approximately one inch thick and narrower than the trellis so it’s easily hidden.
To fix the trellis to the fence, first drill a pilot hole to guide the nail through so the wood won’t split. Then, drill straight through the trellis into the batten to secure it to the fence. Repeat this at the top and bottom of the trellis. Depending on the size and weight, you may need to add another screw to the middle of the trellis and battens.
How to paint a fence
Once you’ve put up your fence, you need to protect it with paint or a stain. This will prevent moisture from seeping in and causing rot, as well as protecting the wood against the sun and preventing it greying.
You don’t have to pick a traditional fence paint colour either. We’ve got Garden Paint which can be used on your fence, or 15 different colours of fence paint that add extra protection too. There’s plenty of choice!
There are a few ways you can paint a fence: with a brush, with a sprayer, or even with a roller. We’ll walk you through the easiest ways to get the job done.
The preparation is the same no matter what you use to paint your fence.
- Check the weather forecast
This step applies to painting any outdoor, wooden surface unless you’re using a product that lets you paint in the rain.
The day you paint, your fence needs to be completely dry. So check the forecast and pick a day that’s warm (above 10 degrees) and isn’t too hot. Dry wood absorbs the paint better but if the temperature is too hot, it could cause the paint to dry quickly and become flaky.
- Clean your fence
Now you might think this step is unnecessary or time consuming, but cleaning your fence before you paint it will ensure it has a nice, even finish. If your fence is covered in grime like moss or dirt, use a diluted general purpose cleaner to remove it. If it’s already reasonably clean, a stiff wire brush will help to sweep off any excess dirt.
- Remove old paint
If your fence has old, flaky paint on it, you’ll need to remove it with sandpaper. A power sander will obviously get the job done very quickly but unfortunately we don’t all have one in the garage! If that’s you, sandpaper is perfectly fine to remove old, ugly, flaky paint.
- Lay down dustsheets
Take precautions and use dust sheets to cover any garden furniture or plants in the immediate vicinity.
This is an absolute must if you’re using a power sprayer. They’re undoubtedly the fastest way to paint your fence, but they can get a little bit messy!
- Make sure the colour is consistent
Use a paintbrush handle or another wooden tool to stir the paint. This will ensure the colour is thoroughly mixed and give you the best finish.
- How to paint a fence with a brush
A paintbrush might be the slowest way to paint but it’s also the most precise so it’s well suited for latticing or intricate fencing.
Dip in your brush so approximately the bottom half of the bristles are covered. Wipe off the excess paint on the rim of the tin.
Apply a thick layer of paint and spread it across the fence going with the grain. Focus on one panel at a time and make sure you don’t spread the paint too far or thinly. If notice drips, careful prevent them from running any further by going over them with your paintbrush.
- How to paint a fence with a roller
Painting with a roller is significantly quicker than painting with a brush and will leave you with an even finish.
Pour the paint into a paint tray. Dip the roller in the tray so it’s evenly covered and wipe off any excess paint.
Apply the paint or stain to the fence panel working in smooth upwards motions. Move onto the next panel, ensuring you overlap by about 50% so there is a consistent coverage.

- How to quickly paint your fence with a sprayer
Stir your paint or stain for a consistent colour and test it on a small patch before you begin painting properly. Once you’re satisfied with the colour, it’s time to tackle the rest of your fence.
Use long, sweeping arm movements and keep the nozzle about 15 cm away from the surface of your fence. Move horizontally along the full fence panel and then drop down to the next section and repeat. Try to overlap each section by about 50% to ensure the whole fence is covered with the same amount of paint.
What colour fence paint makes gardens look bigger?
There are several different ways you can make a small garden feel bigger but one easy way is by painting your fence.
For small gardens, white paint and other light shades reflect light and can make the space feel bigger. It also gives your garden a Mediterranean feel and is a great backdrop for bright plants and flowers.
Heavy, bold and dark shades can swamp a space, leaving it feeling cramped and small.
When do I need to treat my fence?
If you’ve bought your wood panels brand new then you should treat them as soon as possible. Our fence treatments will keep the wood healthy and protected against all the elements for years to come.
Fence painting ideas
If you’re really keen to put up a fence in your garden but don’t want to settle for a boring shade of brown or green, we’ve got 24 colours garden colours, and 15 colours in our fence paint for you to choose from.
How to fix a fence
Fences can become damaged over time and can certainly take a battering when the weather deteriorates. If you find a damaged panel, here’s how to easily fix it.
- Remove the broken panel
Grab a crow bar and pry apart the side panel of the fence from the post. Don’t completely pull it out, just do it until you can see the nails and get to them.
- Separate the panels
Remove the nails at both ends of the panel with a hacksaw, pliers or a claw hammer. You can then completely remove the panel and prepare the new one to put in its place.
- Follow the steps
To install the new panel, follow the steps under ‘How to build a fence’ and you’ll have a good-as-new fence in no time at all.
We recommend…


