
How to paint the exterior of your house

Project overview
How to paint masonry
Painting the exterior of your house is one of the biggest and most transformative jobs you can do. Given the scale, it can be quite time consuming, so planning is essential. You can hire people to paint your house for you, but if you want to do it yourself, here’s our advice.
What surface can I paint?
First of all, let’s start with what kinds of surfaces you can paint. Houses are covered in all sorts of different protective coatings, and some are easier to paint than others.
Textured surfaces like pebbledash are tough to paint. Because of the uneven and bumpy texture, it can take a few coats to get an even coverage.
Smoother surfaces like render are reasonably easy to paint depending on the quality. If it’s in good condition you will need minimal prep; if it’s patchy or covered in grime, you will need to do more work.
If you’re looking to paint brick, it’s best to talk to a professional first. Brick needs to breathe and painting it is a permanent change that you won’t be able to undo. You may end up damaging the brick, which can be very expensive in the long run. If the brick is already painted, badly damaged, or is meant to be painted to be protected, then you might be able to paint it.
Planning the job
Painting the exterior of your home is a pretty irreversible job, so you need to be absolutely sure it’s what you want to do.
There are a couple of practicalities you’ll need to do before you start prepping. First, if you live in a conservation area, there might be planning restrictions that mean you can’t use specific colours, so check what you can and can’t do.
Secondly, if you live in a terraced or semi-detached house, we recommend you talk to your neighbours about your plans. This will help to prevent any potential hiccups or arguments once you start painting.
It sounds pretty basic but write down what you’re going to do and how you need to execute it. Painting the outside of your house is different from painting your kitchen and being as prepared as possible will help.
Make a note of the order you’re going to paint in and what you need to do at each stage. This will help the job feel more manageable and digestible too.
At this point, you need to think about the equipment you need. Here’s what we recommend:
- Masonry paint or Xactly Exterior paint
- Brushes, rollers and a sprayer
- Protective sheets
- Decorators tape
- Brush cleaner
- Ladder
- Wire brush
- Power washer
Depending on the quality of the surface you want to paint, you might need extras like filler, sandpaper, and paint thinner.
You might also need to get in touch with a scaffolding company, which will make painting higher parts much easier and safer too!
Prepping
So you’ve spoken to everyone you need to talk to, know the steps you’re taking, you’re ready to dive into the prep.
You need a clean surface if you want the best results. Painting over dirt will result in a horrible job, could make the problem worse, and might cause the paint to flake as it’s not stuck to the wall.
Mould and green growth might suggest you have a damp problem, which needs fixing before you start painting.
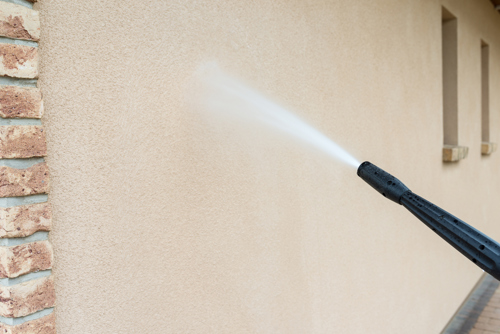
You can use a power washer to clean your house, which will not only do a good job but is very satisfying to use too!
If the wall you’re going to paint has visible damage like cracks, it might need rendering again. If you’re unsure, you can ask a professional for their opinion.
Depending on the product you’re going to use, leave the wall to dry before you start.
If the wall has already been painted and is in bad condition, you need to remove all peeling or flaking paint. Sand down any rough bits and fill holes in woodwork and walls.
Put down protective sheets and use decorators tape to protect the parts you don’t want to paint, like windowsills.
You don’t necessarily have to wait for a dry day to start painting. The best day to paint the exterior of your house is dry, mild and cloudy.
If the exterior is flaky or powdery, you need to use a stabilising primer first. This sets a strong base for the paint to stick to and will give you a smooth finish. If the surface is fine and even, you don’t need a primer and can paint straight onto the wall.
Painting
You will save yourself loads of time if you use a sprayer. It will also give you an even coating and is significantly less faff.
Start at the top and make your way down. This way if there are any paint splashes on the lower half of your house, you can cover them up easily later.
Hold the sprayer a few centimetres away from the wall and move your arm in a smooth motion. Work in metre-square sections and don’t stretch, remember you’re at the top of a ladder!
For painting behind drainpipes, wrap them in newspaper first, so you don’t get paint on them. You might need to use a paintbrush to get into all those nooks and crannies.
If you’ve done all the right prep, painting will take you half the time it would otherwise. Check the instructions of the paint you’re using to see how many coats you need to apply.
Once you’ve applied the last coat of paint, peel off the decorators tape before the paint dries. This way, you won’t damage your new paint job.
Aftercare
Top tip: Looking after your fresh paint is one of the best ways to help it last longer. Otherwise, you’ll have to break out the pressure washer now and again and treat any troublesome patches.
As we said, painting the exterior of your house is a big job that shouldn’t be taken lightly. If you do the right planning and prep, this will be a much easier job.


